Как добавить push-уведомление в мое собственное приложение для android
Я разработал приложение push-уведомлений в Android из этого учебника: push-уведомление в android app. Кнопка регистрация отображается при запуске приложения. Когда я нажимаю на кнопку регистрации, и когда регистрация успешна, на моем устройстве отображается уведомление.
Как я могу включить его в мои собственные приложения? В моем приложении есть одно приложение для анализа xml. Здесь, когда добавляется какой-либо новый элемент, я хочу отобразить (отображается новый порядок ) a уведомление на устройстве. Он автоматически генерируется здесь.
3 ответов
Я размещаю демонстрационное приложение Google Cloud Messaging.
убедитесь, что вы создали демо-приложение с уровнем API равным или выше Android OS 2.2 с Google API
пользователь должен войти в по крайней мере один аккаунт Google, чтобы использовать эту услугу.
сначала вы должны добавить библиотека GCM.
чем создать по классу который я назвал GCMIntentService которая расширяет GCMBaseIntentService as следует:
package com.example.gcmdemo;

import android.content.Context;
import android.content.Intent;
import android.util.Log;

import com.google.android.gcm.GCMBaseIntentService;
import com.google.android.gcm.GCMConstants;

public class GCMIntentService extends GCMBaseIntentService {

     private static final String TAG = "Push Notification Demo GCMIntentService";

    @Override
    protected void onError(Context context, String errorId) {

        if(GCMConstants.ERROR_ACCOUNT_MISSING.equalsIgnoreCase(errorId)) {
            Log.v(TAG, "Error Account Missing");
        } else if(GCMConstants.ERROR_AUTHENTICATION_FAILED.equalsIgnoreCase(errorId)) {
            Log.v(TAG, "Error Authentication Failed");
        } else if(GCMConstants.ERROR_INVALID_PARAMETERS.equalsIgnoreCase(errorId)) {
            Log.v(TAG, "Error Invalid Parameters");
        } else if(GCMConstants.ERROR_INVALID_SENDER.equalsIgnoreCase(errorId)) {
            Log.v(TAG, "Error Invalid Sender");
        } else if(GCMConstants.ERROR_PHONE_REGISTRATION_ERROR.equalsIgnoreCase(errorId)) {
            Log.v(TAG, "Error Phone Registration Error");
        } else if(GCMConstants.ERROR_SERVICE_NOT_AVAILABLE.equalsIgnoreCase(errorId)) {
            Log.v(TAG, "Error Service Not Available");
        }
    }

    @Override
    protected void onMessage(Context context, Intent intent) {

        // App Server Sends message as key value pairs
        String value1 = intent.getStringExtra("key1");
        String value2 = intent.getStringExtra("key2");

        Log.v(TAG, "key1: "+value1 );
        Log.v(TAG, "key2: "+value2 );
    }

    @Override
    protected void onRegistered(Context context, String regId) {

        Log.v(TAG, "Successfull Registration : "+regId);
    }

    @Override
    protected void onUnregistered(Context context, String regId) {

        Log.v(TAG, "Successfully Unregistred : "+regId);
    }

    @Override
    protected String[] getSenderIds(Context context) {
        return super.getSenderIds(context);
    }

    @Override
    protected void onDeletedMessages(Context context, int total) {
        super.onDeletedMessages(context, total);
    }

    @Override
    protected boolean onRecoverableError(Context context, String errorId) {
        return super.onRecoverableError(context, errorId);
    }
}
вот как вы должны проверить регистрацию в следующей демо-активности:
package com.example.gcmdemo;

import android.app.Activity;
import android.os.Bundle;
import android.util.Log;
import android.view.Menu;

import com.google.android.gcm.GCMRegistrar;

public class MainActivity extends Activity {

    private static final String TAG = "Push Notification Demo Activity";
    private static final String SENDER_ID = "1069713227710";

    @Override
    public void onCreate(Bundle savedInstanceState) {
        super.onCreate(savedInstanceState);
        setContentView(R.layout.activity_main);

        GCMRegistrar.checkDevice(this);
        GCMRegistrar.checkManifest(this);
        final String regId = GCMRegistrar.getRegistrationId(this);
        if (regId.equals("")) {
          GCMRegistrar.register(this, SENDER_ID);
        } else {
          Log.v(TAG, "Already registered : "+regId);
        }
    }

    @Override
    public boolean onCreateOptionsMenu(Menu menu) {
        getMenuInflater().inflate(R.menu.activity_main, menu);
        return true;
    }
}
и, наконец, демонстрационный манифест:
<manifest xmlns:android="http://schemas.android.com/apk/res/android"
    package="com.example.gcmdemo"
    android:versionCode="1"
    android:versionName="1.0" >

    <uses-sdk
        android:minSdkVersion="8"
        android:targetSdkVersion="8" />

    <permission
        android:name="com.example.gcmdemo.permission.C2D_MESSAGE"
        android:protectionLevel="signature" />

    <uses-permission android:name="com.example.gcmdemo.permission.C2D_MESSAGE" />

    <!-- App receives GCM messages. -->
    <uses-permission android:name="com.google.android.c2dm.permission.RECEIVE" />
    <!-- GCM connects to Google Services. -->
    <uses-permission android:name="android.permission.INTERNET" />
    <!-- GCM requires a Google account. -->
    <uses-permission android:name="android.permission.GET_ACCOUNTS" />
    <!-- Keeps the processor from sleeping when a message is received. -->
    <uses-permission android:name="android.permission.WAKE_LOCK" />

    <application
        android:icon="@drawable/ic_launcher"
        android:label="@string/app_name"
        android:theme="@style/AppTheme" >
        <activity
            android:name=".MainActivity"
            android:label="@string/title_activity_main" >
            <intent-filter>
                <action android:name="android.intent.action.MAIN" />

                <category android:name="android.intent.category.LAUNCHER" />
            </intent-filter>
        </activity>

        <receiver
            android:name="com.google.android.gcm.GCMBroadcastReceiver"
            android:permission="com.google.android.c2dm.permission.SEND" >
            <intent-filter>
                <action android:name="com.google.android.c2dm.intent.RECEIVE" />
                <action android:name="com.google.android.c2dm.intent.REGISTRATION" />

                <category android:name="com.example.gcmdemo" />
            </intent-filter>
        </receiver>

        <service android:name=".GCMIntentService" />
    </application>

</manifest>
Также вам понадобится сторонний серверный скрипт, как указано здесь.
лично предлагаю вам, что вместо GCM есть и другая библиотека с именем парсить для PushNotification, он работает так же, как Google Cloud Messaging, но это так так так просто, то GCM
вы должны просто скачать файл JAR и простой две-три строки кода для PUSH-уведомления
научиться использовать этот сайт https://parse.com/tutorials/android-push-notifications
даже вам не нужно использовать PHP или какой-либо серверный код предоставляет вам средство
смотрите я дам вам демо
  Parse.initialize(this, "YOUR_APP_ID", "YOUR_CLIENT_KEY");
  PushService.setDefaultPushCallback(this, YourDefaultActivity.class);
сверху кода достаточно для получать push-уведомления
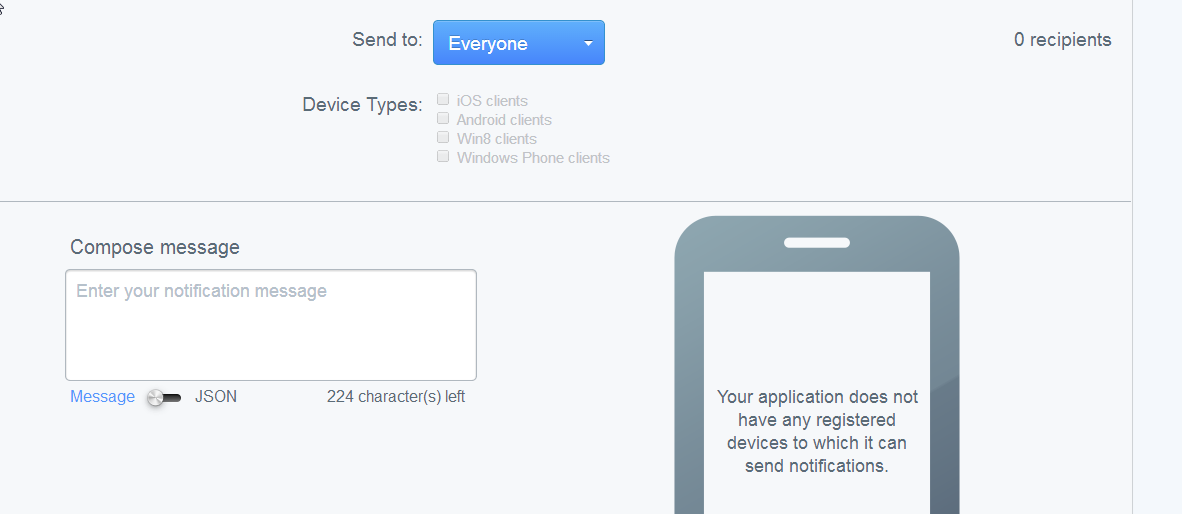
Если вы хотите отправить уведомление они обеспечивают хороший внешний вид пользовательского интерфейса изображение пользовательского интерфейса они обеспечивают
отправка Push-уведомления с помощью FCM
Google устарел Google Cloud Messaging (GCM) и запустил новый сервер Push-уведомлений, который является Firebase Cloud Messaging (FCM). FCM такой же, как GCM, FCM также является кросс-платформенным решением для обмена сообщениями для мобильных платформ
Firebase Cloud Messaging может отправлять сообщения трех типов (сообщение типы)
1.Уведомление Сообщение
2.Сообщение Данных
3.сообщение с уведомлением и данными
Firebase Cloud Messaging шаги интеграции: -
1.Настройка нового проекта или импорт проекта в консоли Firbase(https://firebase.google.com/)
2.Добавить тот же пакет Имя приложения в приложении Firebase.
3.Получите "google-сервисы".JSON " и поместите этот файл в папку приложения вашего проекта.Этот файл содержит все URL-адреса и ключи для службы Google, поэтому не изменяйте и не редактируйте этот файл.
4.Добавьте новые зависимости Gradle в Project для Firebase.
//app/build.gradle
dependencies {
  compile 'com.google.firebase:firebase-messaging:9.6.0'
}

apply plugin: 'com.google.gms.google-services'
5.Создайте класс, содержащий все постоянные значения, которые мы используем в приложении для FCM.
public class Config {
 public static final String TOPIC_GLOBAL = "global";
 // broadcast receiver intent filters
public static final String REGISTRATION_COMPLETE = "registrationComplete";
public static final String PUSH_NOTIFICATION = "pushNotification";

// id to handle the notification in the notification tray
public static final int NOTIFICATION_ID = 100;
public static final int NOTIFICATION_ID_BIG_IMAGE = 101;
public static final String SHARED_PREF = "ah_firebase";
 }
6. Создание класса с именем MyFirebaseInstanceIDService.java, который получит идентификатор регистрации firebase, который будет уникальным для каждого приложения. Идентификатор регистрации используется для отправки сообщения на одно устройство.
    public class MyFirebaseInstanceIDService extends FirebaseInstanceIdService {
    private static final String TAG = MyFirebaseInstanceIDService.class.getSimpleName();

    @Override
    public void onTokenRefresh() {
        super.onTokenRefresh();
        String refreshedToken = FirebaseInstanceId.getInstance().getToken();

        // Saving reg id to shared preferences
        storeRegIdInPref(refreshedToken);

        // sending reg id to your server
        sendRegistrationToServer(refreshedToken);

        // Notify UI that registration has completed, so the progress indicator can be hidden.
        Intent registrationComplete = new Intent(Config.REGISTRATION_COMPLETE);
        registrationComplete.putExtra("token", refreshedToken);
        LocalBroadcastManager.getInstance(this).sendBroadcast(registrationComplete);
    }

    private void sendRegistrationToServer(final String token) {
        // sending gcm token to server
        Log.e(TAG, "sendRegistrationToServer: " + token);
    }

    private void storeRegIdInPref(String token) {
    SharedPreferences pref =     getApplicationContext().getSharedPreferences(Config.SHARED_PREF, 0);
        SharedPreferences.Editor editor = pref.edit();
        editor.putString("regId", token);
        editor.commit();
    }
    }
7.Создайте еще один класс обслуживания с именем MyFirebaseMessagingService.Ява. Это будет получать сообщения firebase.
public class MyFirebaseMessagingService extends FirebaseMessagingService {

    private static final String TAG = MyFirebaseMessagingService.class.getSimpleName();

    private NotificationUtils notificationUtils;

    @Override
    public void onMessageReceived(RemoteMessage remoteMessage) {
        Log.e(TAG, "From: " + remoteMessage.getFrom());

        if (remoteMessage == null)
            return;

        // Check if message contains a notification payload.
        if (remoteMessage.getNotification() != null) {
            Log.e(TAG, "Notification Body: " + remoteMessage.getNotification().getBody());
            handleNotification(remoteMessage.getNotification().getBody());
        }
    }
 private void handleNotification(String message) {
        if (!NotificationUtils.isAppIsInBackground(getApplicationContext())) {
            // app is in foreground, broadcast the push message
            Intent pushNotification = new Intent(Config.PUSH_NOTIFICATION);
            pushNotification.putExtra("message", message);
            LocalBroadcastManager.getInstance(this).sendBroadcast(pushNotification);

            // play notification sound
            NotificationUtils notificationUtils = new NotificationUtils(getApplicationContext());
            notificationUtils.playNotificationSound();
        }else{
            // If the app is in background, firebase itself handles the notification
        }
    }
 /**
     * Showing notification with text only
     */
    private void showNotificationMessage(Context context, String title, String message, String timeStamp, Intent intent) {
        notificationUtils = new NotificationUtils(context);
        intent.setFlags(Intent.FLAG_ACTIVITY_NEW_TASK | Intent.FLAG_ACTIVITY_CLEAR_TASK);
        notificationUtils.showNotificationMessage(title, message, timeStamp, intent);
    }

    /**
     * Showing notification with text and image
     */
    private void showNotificationMessageWithBigImage(Context context, String title, String message, String timeStamp, Intent intent, String imageUrl) {
        notificationUtils = new NotificationUtils(context);
        intent.setFlags(Intent.FLAG_ACTIVITY_NEW_TASK | Intent.FLAG_ACTIVITY_CLEAR_TASK);
        notificationUtils.showNotificationMessage(title, message, timeStamp, intent, imageUrl);
    }
}
8.В AndroidManifest.xml добавьте эти две службы firebase MyFirebaseMessagingService и MyFirebaseInstanceIDService.
 <!-- Firebase Notifications -->
        <service android:name=".service.MyFirebaseMessagingService">
            <intent-filter>
                <action android:name="com.google.firebase.MESSAGING_EVENT" />
            </intent-filter>
        </service>

        <service android:name=".service.MyFirebaseInstanceIDService">
            <intent-filter>
                <action android:name="com.google.firebase.INSTANCE_ID_EVENT" />
            </intent-filter>
        </service>
        <!-- ./Firebase Notifications -->
теперь просто отправить первое сообщение
Примечания :
*1.Прочитайте документ Google для Firebase Cloud Messaging *
2.Если вы хотите перенести клиентское приложение GCM для Android в Firebase Cloud Messaging, выполните следующие действия и Doc (перенос клиента GCM App)
3.Android пример учебник и код ( Получать Уведомления О Реорганизации)