Как изменить MahApps.Ширина шаблона содержимого диалога Metro?
Я хотел бы изменить базовый шаблон MahApps.Метро!--4--> диалоги (или создать новый тип диалога), потому что я хотел бы показать их в узком окне входа в систему. Прямо сейчас почти все вторые слова в сообщении находятся в новой строке, но есть хорошие большие пробелы справа и слева, которые я хотел бы уменьшить.
Я нашел в BaseMetroDialog.xaml что окно сообщений разделено на три части по вертикали: 25% место на левой стороне, 50% для содержания и 25% пробел с правой стороны. Я хотел бы изменить эти цифры.
но как я могу изменить шаблон контроля BaseMetroWindow мой новый?
4 ответов
просто создайте свой собственный стиль, который перекрывает диалоговое окно Template (и добавить DialogShownStoryboard тоже).
<Style TargetType="{x:Type Dialog:BaseMetroDialog}"
        x:Key="NewCustomDialogStyle"
        BasedOn="{StaticResource {x:Type Dialog:BaseMetroDialog}}">
    <Setter Property="Template">
        <Setter.Value>
            <ControlTemplate TargetType="{x:Type Dialog:BaseMetroDialog}">
                <ControlTemplate.Resources>
                    <Storyboard x:Key="DialogShownStoryboard">
                        <DoubleAnimation AccelerationRatio=".9"
                                            BeginTime="0:0:0"
                                            Duration="0:0:0.2"
                                            Storyboard.TargetProperty="Opacity"
                                            To="1" />
                    </Storyboard>
                </ControlTemplate.Resources>
                <Grid Background="{TemplateBinding Background}">
                    <Border FocusVisualStyle="{x:Null}"
                            Focusable="False">
                        <Grid>
                            <Grid.RowDefinitions>
                                <RowDefinition Height="Auto" />
                                <RowDefinition Height="*" />
                                <RowDefinition Height="Auto" />
                            </Grid.RowDefinitions>
                            <ContentPresenter Grid.Row="0"
                                                Content="{TemplateBinding DialogTop}" />
                            <Grid Grid.Row="1">
                                <Grid.ColumnDefinitions>
                                    <ColumnDefinition Width="10*" />
                                    <ColumnDefinition Width="80*" />
                                    <ColumnDefinition Width="10*" />
                                </Grid.ColumnDefinitions>
                                <!--  Content area  -->
                                <Grid Grid.Column="1"
                                        Margin="0 10 0 0">
                                    <Grid.RowDefinitions>
                                        <RowDefinition Height="Auto" />
                                        <RowDefinition Height="*" />
                                    </Grid.RowDefinitions>
                                    <TextBlock Grid.Row="0"
                                                FontSize="{DynamicResource DialogTitleFontSize}"
                                                Foreground="{TemplateBinding Foreground}"
                                                Text="{TemplateBinding Title}"
                                                TextWrapping="Wrap" />
                                    <ContentPresenter Grid.Row="1"
                                                        Content="{TemplateBinding Content}" />
                                </Grid>
                            </Grid>
                            <ContentPresenter Grid.Row="2"
                                                Content="{TemplateBinding DialogBottom}" />
                        </Grid>
                    </Border>
                </Grid>
                <ControlTemplate.Triggers>
                    <EventTrigger RoutedEvent="Loaded">
                        <EventTrigger.Actions>
                            <BeginStoryboard Storyboard="{StaticResource DialogShownStoryboard}" />
                        </EventTrigger.Actions>
                    </EventTrigger>
                </ControlTemplate.Triggers>
            </ControlTemplate>
        </Setter.Value>
    </Setter>
</Style>
пространство имен здесь
xmlns:Dialog="clr-namespace:MahApps.Metro.Controls.Dialogs;assembly=MahApps.Metro"
теперь используйте этот пользовательский стиль, например, для пользовательского диалога
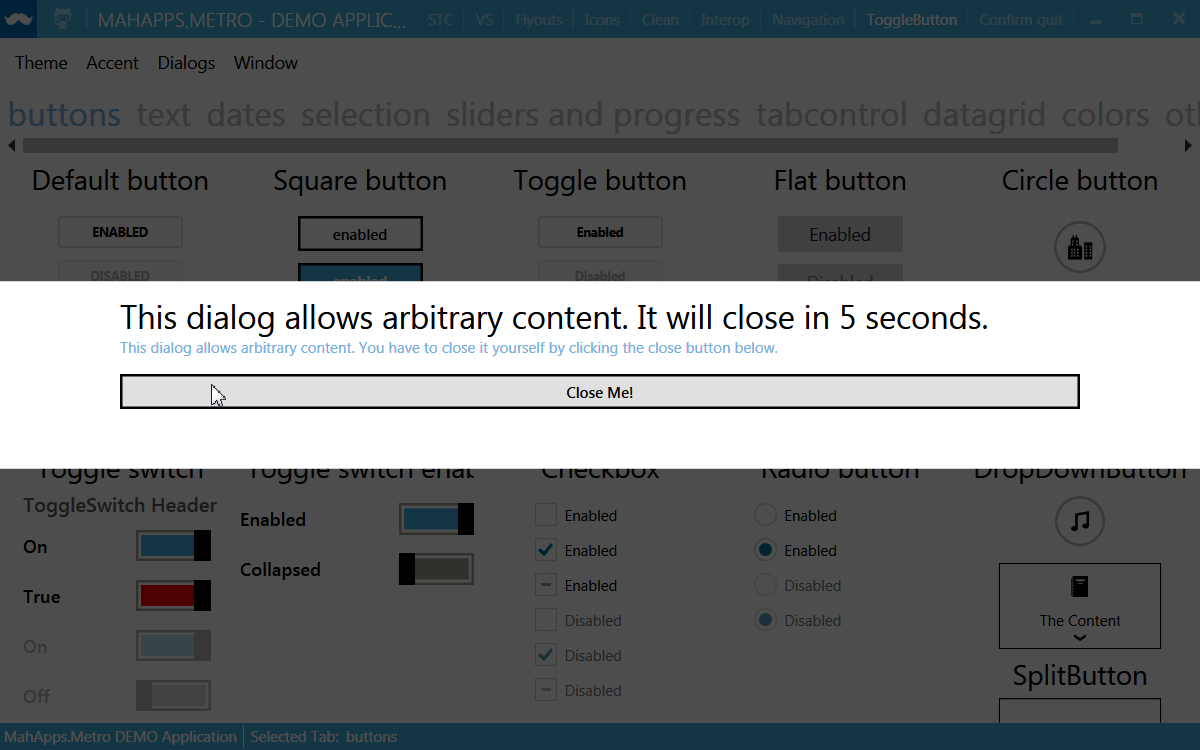
<Dialog:CustomDialog x:Key="CustomDialogTest"
                        Style="{StaticResource NewCustomDialogStyle}"
                        Title="This dialog allows arbitrary content. It will close in 5 seconds."
                        x:Name="CustomTestDialog">
    <StackPanel>
        <TextBlock Height="30"
                    Text="This dialog allows arbitrary content. You have to close it yourself by clicking the close button below."
                    TextWrapping="Wrap"
                    Foreground="{DynamicResource AccentColorBrush}" />
        <Button Content="Close Me!" />
    </StackPanel>
</Dialog:CustomDialog>
скриншот из основной демо
обновление
С последней версией MahApps.Метро теперь можно изменить, например,MessageDialog стиль глобально.
<Style TargetType="{x:Type Dialog:MessageDialog}"
       x:Key="NewCustomMessageDialogStyle"
       BasedOn="{StaticResource {x:Type Dialog:BaseMetroDialog}}">
  <Setter Property="Template">
    <!-- the custom template for e.g. MessageDialog -->
  </Setter>
</Style>

<Style TargetType="{x:Type Dialog:MessageDialog}" BasedOn="{StaticResource NewCustomMessageDialogStyle}" />
надеюсь, что это поможет!
мне потребовалось некоторое время, чтобы разобраться в этом, но для таких новичков, как я, вот мое полностью документированное решение для создания настраиваемых диалоговых окон с помощью mahapps и MVVM. Вероятно, есть аспекты, которые можно было бы улучшить, но это то, что сработало для меня.
объявите свой словарь ресурсов диалогового окна в приложении.xaml, поэтому он доступен глобально
App.в XAML
  <Application x:Class="MyAppName.App"
            xmlns="http://schemas.microsoft.com/winfx/2006/xaml/presentation"
            xmlns:x="http://schemas.microsoft.com/winfx/2006/xaml"
            xmlns:local="clr-namespace:MyAppName"
            xmlns:Controls="clr-namespace:MahApps.Metro.Controls;assembly=MahApps.Metro"
            xmlns:Dialog="clr-namespace:MahApps.Metro.Controls.Dialogs;assembly=MahApps.Metro"

            >
     <Application.Resources>
        <ResourceDictionary>
            <ResourceDictionary.MergedDictionaries>
               <ResourceDictionary>
               <ResourceDictionary  Source="DialogResource.xaml" />
            </ResourceDictionary.MergedDictionaries>
        </ResourceDictionary>
     </Application.Resources>
  </Application>
словарь ресурсов содержит код замены шаблона для пользовательского диалоговое окно
DialogResource.в XAML
  <ResourceDictionary xmlns="http://schemas.microsoft.com/winfx/2006/xaml/presentation"
                  xmlns:x="http://schemas.microsoft.com/winfx/2006/xaml"
                  xmlns:local="clr-namespace:MyAppName.MyResources"
                  xmlns:Controls="clr-namespace:MahApps.Metro.Controls;assembly=MahApps.Metro"
                  xmlns:Dialog="clr-namespace:MahApps.Metro.Controls.Dialogs;assembly=MahApps.Metro"

                  >

     <!== Override default template for Mahapps custom dialog -->

     <Style TargetType="{x:Type Dialog:BaseMetroDialog}"
        x:Key="NewCustomDialogStyle"
        BasedOn="{StaticResource {x:Type Dialog:BaseMetroDialog}}">
        <Setter Property="Template">
            <!-- Custom template xaml code goes here -- see above StackOverflow answer from Punker76 --->
        </Setter>
     </Style>

  </ResourceDictionary>
создайте окно WPF с именем UserInputDialog затем замените все код xaml с помощью customdialog xaml. Im использует синтаксис Caliburn Micro для привязки кнопок к диалоговому окну подложки viewmodel (cal:Message.Придавать.)= В случае диалогового кода xaml мне нужно вручную указать привязки кнопок, так как по какой-то причине с Caliburn Micro он не является автоматическим, как в главном представлении модель.
UserInputDialog.в XAML
  <Dialog:CustomDialog
                    x:Name="MyUserInputDialog"
                    x:Class="MyAppName.UserInputDialog"
                    Style="{StaticResource NewCustomDialogStyle}"
                    xmlns="http://schemas.microsoft.com/winfx/2006/xaml/presentation"
                    xmlns:x="http://schemas.microsoft.com/winfx/2006/xaml"
                    xmlns:d="http://schemas.microsoft.com/expression/blend/2008"
                    xmlns:mc="http://schemas.openxmlformats.org/markup-compatibility/2006"
                    xmlns:Dialog="clr-namespace:MahApps.Metro.Controls.Dialogs;assembly=MahApps.Metro"
                    xmlns:Controls="clr-namespace:MahApps.Metro.Controls;assembly=MahApps.Metro"
                    xmlns:cal="http://www.caliburnproject.org"
                    xmlns:diag="clr-namespace:System.Diagnostics;assembly=WindowsBase"

                    >

     <!--      , diag:PresentationTraceSources.TraceLevel=High        -->

     <StackPanel Orientation="Vertical" HorizontalAlignment="Center" VerticalAlignment="Center"  >

        <Label HorizontalAlignment="Center" Margin="10" Content="{Binding MessageText}" />

        <TextBox    x:Name="tbInput"
                   Width="200"
                   Margin="10"
                   Content="{Binding UserInput}"
                   HorizontalAlignment="Center"
                   KeyDown="tbInput_KeyDown"
                   />

        <StackPanel Orientation="Horizontal" HorizontalAlignment="Center" Margin="10,20" >

            <Button x:Name="butOK"
               Content="OK"
               Width="80"
               Margin="10,0"
               HorizontalAlignment="Center"
               cal:Message.Attach="butOK"
               />

            <Button x:Name="butCancel"
               Content="Cancel"
               Width="80"
               Margin="10,0"
               HorizontalAlignment="Center"
               cal:Message.Attach="butCancel"
               />


        </StackPanel>
     </StackPanel>

  </Dialog:CustomDialog>
и код-за Для UserInputDialog:
UserInputDialog.код XAML.cs
  using MahApps.Metro.Controls.Dialogs;
  using System;
  using System.Windows;
  using System.Windows.Controls;
  using System.Windows.Input;

  namespace MyAppName
  {
     public partial class UserInputDialog : CustomDialog
     {
        public UserInputDialog()
        {
            InitializeComponent();

            MinWidth = 300;
            MinHeight = 300;

            Loaded += Dialog_Loaded;
        }

     private void Dialog_Loaded(Object sender, RoutedEventArgs e)
     {
        tbInput.Focus();
     }


     private void tbInput_KeyDown(object sender, KeyEventArgs e)
     {
        //Not strictly MVVM but prefer the simplicity of using code-behind for this
        switch (e.Key)
        {

            case Key.Enter:
               if(this.DataContext != null) (dynamic)this.DataContext.butOK();
               break;

            case Key.Escape:
               if(this.DataContext != null) (dynamic)this.DataContext.butCancel();
               break;
        }

     }


  }
  }
создать класс viewmodel специально для диалога ввода пользователя
UserInputViewModel.cs
  using System;
  using System.Windows.Input;
  using Caliburn.Micro;
  using MyAppName.Models;
  using System.Security;

  namespace MyAppName.ViewModels
  {
     public class UserInputViewModel : PropertyChangedBase
     {

        private readonly ICommand _closeCommand;

        public string MessageText { get; set; }  // Message displayed to user

        public string UserInput { get; set; }   // User input returned

        public bool Cancel { get; set; }  // Flagged true if user clicks cancel button

        //Constructor
        public UserInputViewModel(Action<UserInputViewModel> closeHandler)
        {
            Cancel = false;
            _closeCommand = new SimpleCommand { ExecuteDelegate = o => closeHandler(this) };
        }

        public void butCancel()
        {
            Cancel = true;
            _closeCommand.Execute(this);
        }

        public void butOK()
        {
            Cancel = false;
            _closeCommand.Execute(this);
        }

        //-----------------
     }
  }
создайте отдельный класс ICommand для передачи во внешнем диалоговом окне функции close с помощью конструктора dialog viewmodel
SimpleCommand.cs
  using System;
  using System.Windows.Input;

  namespace MyAppName.Models
  {
     public class SimpleCommand : ICommand
     {
        public Predicate<object> CanExecuteDelegate { get; set; }
        public Action<object> ExecuteDelegate { get; set; }

        public bool CanExecute(object parameter)
        {
            if (CanExecuteDelegate != null)
               return CanExecuteDelegate(parameter);
            return true; // if there is no can execute default to true
        }

        public event EventHandler CanExecuteChanged
        {
            add { CommandManager.RequerySuggested += value; }
            remove { CommandManager.RequerySuggested -= value; }
        }

        public void Execute(object parameter)
        {
            if (ExecuteDelegate != null)
               ExecuteDelegate(parameter);
        }
     }
  }
и наконец, вот код модели основного вида для отображения настроенного диалогового окна и обработки возвращенного пользовательского ввода: -
MainViewModel.cs
  using MahApps.Metro.Controls.Dialogs;
  namespace MyAppName.ViewModels
  {
     /// <summary>
     /// The ViewModel for the application's main window.
     /// </summary>
     public class MainViewModel : PropertyChangedBase
     {


        private readonly IDialogCoordinator _dialogCoordinator;

        //Constructor
        public MainViewModel(IDialogCoordinator dialogCoordinator)
        {
            // Dialog coordinator provided by Mahapps framework
            // Either passed into MainViewModel constructor to conform to MVVM:-

            _dialogCoordinator = dialogCoordinator;

            // or just initialise directly here
            // _dialogCoordinator = new DialogCoordinator();
        }


        public async void GetUserInput()
        {

            var custom_dialog = new UserInputDialog();

            custom_dialog.Height = 300;
            custom_dialog.Width = 400;

            var dialog_vm = new UserInputViewModel(async instance =>
            {
               await _dialogCoordinator.HideMetroDialogAsync(this, custom_dialog);
               //instance --> dialog ViewModel
               if (!(instance.Cancel || String.IsNullOrEmpty(instance.UserInput)) ProcessUserInput(instance.UserInput);
            });

            dialog_vm.MessageText = "Please type in your first name";

            custom_dialog.DataContext = dialog_vm;

            await _dialogCoordinator.ShowMetroDialogAsync(this, custom_dialog);

        }

        public ProcessUserInput(string input_message){
               Console.WriteLine("Users firstname is " + input_message);

        }
    }

  }
переопределить стиль метродиалога и объединить ресурс в окне метро
<Style x:Key="newDialogStyle" BasedOn="{StaticResource MetroDialogStyle}"
TargetType="{x:Type Dialogs:BaseMetroDialog}">
<!-- ur design of Control Template -->
</Style>
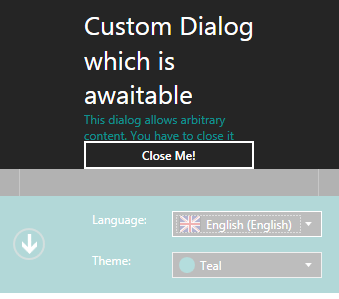
<Dialogs:CustomDialog Style="{StaticResource newDialogStyle}" Title="Custom Dialog which is awaitable">
<StackPanel>
<TextBlock Height="30" Text="This dialog allows arbitrary content. You have to close it yourself by clicking the close button below."
TextWrapping="Wrap"
Foreground="{DynamicResource AccentColorBrush}" />
<Button Content="Close Me!"/>
</StackPanel>
</Dialogs:CustomDialog>
другое решение предоставляется на ошибка tracker: не используйте свойство Content, вместо этого используйте DialogTop. Например:
<dialogs:CustomDialog.DialogTop>
    <StackPanel>
        ....
    </StackPanel>
</dialogs:CustomDialog.DialogTop>
поместите свой пользовательский контент (например, StackPanel) внутри DialogTop, и все готово.