UIPopover как сделать popover с такими кнопками?
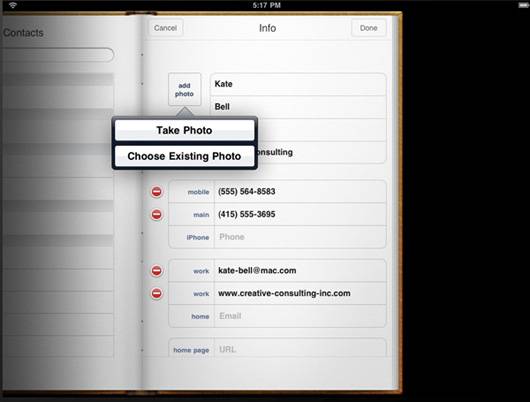
мне интересно, как я могу создать popover с такими кнопками.
ответ:
UIActionSheet * actionSheet = [[UIActionSheet alloc] initWithTitle: nil
                                                          delegate: self
                                                 cancelButtonTitle: nil
                                            destructiveButtonTitle: nil
                                                 otherButtonTitles: @"Take Photo",
                                                                    @"Choose Existing Photo", nil];

[actionSheet showFromRect: button.frame inView: button.superview animated: YES];
где-то еще в вашем делегированном классе объектов...
-(void)actionSheet:(UIActionSheet *)actionSheet clickedButtonAtIndex:(NSInteger)buttonIndex {
    if (buttonIndex == 0) {
         // take photo...
    }
    else if (buttonIndex == 1) {
         // choose existing photo...
    }
}
2 ответов
Это UIActionSheet. На iPhone он анимируется снизу. На iPad он появляется в popover.
предполагая, что вы делаете это нажатием кнопки:
UIActionSheet * actionSheet = [[UIActionSheet alloc] initWithTitle: nil
                                                          delegate: self
                                                 cancelButtonTitle: nil
                                            destructiveButtonTitle: nil
                                                 otherButtonTitles: @"Take Photo",
                                                                    @"Choose Existing Photo", nil];

[actionSheet showFromRect: button.frame inView: button.superview animated: YES];
в iOS8+, вы должны использовать новый UIAlertController класс:
UIAlertController * alertController = [UIAlertController alertControllerWithTitle: nil
                                                                          message: nil
                                                                   preferredStyle: UIAlertControllerStyleActionSheet];
[alertController addAction: [UIAlertAction actionWithTitle: @"Take Photo" style: UIAlertActionStyleDefault handler:^(UIAlertAction *action) {
    // Handle Take Photo here
}]];
[alertController addAction: [UIAlertAction actionWithTitle: @"Choose Existing Photo" style: UIAlertActionStyleDefault handler:^(UIAlertAction *action) {
    // Handle Choose Existing Photo here
}]];

alertController.modalPresentationStyle = UIModalPresentationPopover;

UIPopoverPresentationController * popover = alertController.popoverPresentationController;
popover.permittedArrowDirections = UIPopoverArrowDirectionUp;
popover.sourceView = sender;
popover.sourceRect = sender.bounds;

[self presentViewController: alertController animated: YES completion: nil];
или в Swift
let alertController = UIAlertController(title: nil, message: nil, preferredStyle: .ActionSheet)
alertController.addAction(UIAlertAction(title: "Take Photo", style: .Default, handler: { alertAction in
    // Handle Take Photo here
    }))
alertController.addAction(UIAlertAction(title: "Choose Existing Photo", style: .Default, handler: { alertAction in
    // Handle Choose Existing Photo
    }))
alertController.modalPresentationStyle = .Popover

let popover = alertController.popoverPresentationController!
popover.permittedArrowDirections = .Up
popover.sourceView = sender
popover.sourceRect = sender.bounds

presentViewController(alertController, animated: true, completion: nil)
похож на другие ответы, но это очень легко реализовать в сравнении.
сделайте свой класс использовать UIActionSheetDelegate.
пример:
@interface ExampleViewController : UIViewController <UIActionSheetDelegate>
затем добавьте в свой ExampleViewController.мм / м
- (void)actionSheet:(UIActionSheet *)actionSheet clickedButtonAtIndex:(NSInteger)buttonIndex  { //Get the name of the current pressed button
NSString *buttonTitle = [actionSheet buttonTitleAtIndex:buttonIndex];
if  ([buttonTitle isEqualToString:@"Remove"]) {
    NSLog(@"Remove this actionSheet"); }
if ([buttonTitle isEqualToString:@"Button 1"]) {
    NSLog(@"Button 1 pressed"); }
if ([buttonTitle isEqualToString:@"Button 2"]) {
    NSLog(@"Button 2 pressed"); }
if ([buttonTitle isEqualToString:@"Button 3"]) {
    NSLog(@"Button 3 pressed"); }
if ([buttonTitle isEqualToString:@"Cancel"]) {
    NSLog(@"Cancel clicked (anywhere away from it)"); } }
Теперь в случае нажатия кнопки или где/когда вы хотите, чтобы это всплывающее окно вызывало следующее:
    - (IBAction)aButtonPressed:(id)sender {
     NSString *actionSheetTitle = @"Action Sheet"; // Title
     NSString *destroyTitle = @"Destroy"; // Button titles
     NSString *button1 = @"Button 1";
     NSString *button2 = @"Button 2";
     NSString *button3 = @"Button 3";
     NSString *cancelTitle = @"Cancel";
    UIActionSheet *actionSheet = [[UIActionSheet alloc]
                                  initWithTitle:actionSheetTitle
                                   delegate:self
                                   cancelButtonTitle:cancelTitle
                                   destructiveButtonTitle:destroyTitle
                                   otherButtonTitles:button1, button2, button3, nil]; [actionSheet showInView:self.view];
}
и больше информации об этом @ : http://developer.apple.com/library/ios/#documentation/uikit/reference/UIActionSheet_Class/Reference/Reference.html